Sourdough Simplified: Maintaining Your Starter
Why Sourdough Simplified?
When I began my sourdough journey over 2 years ago, I was completely overwhelmed. Sourdough seems to be one of those things where everyone has their own method and everyone’s method is different, but they all seem to work just the same. It’s confusing to know where to start and who to listen to.
When I cultivated my first starter, it felt like a success! However I had no idea what to do with it next, and I didn’t have a bread recipe. I spent hours upon hours reading different methods and recipes and ended up incredibly frustrated.
I didn’t want to bake a fancy loaf or an artisan loaf. I didn’t want to buy a kitchen scale or a banneton basket. If Ma Ingalls could make sourdough without a kitchen scale, so could I. (One of the biggest pieces of advice I see amongst sourdough circles is to invest in a good kitchen scale. You certainly can if you’d like, but it’s not absolutely necessary.) I wanted to use my measuring cups and the tools I already had. I also wanted a simple method of keeping and feeding my sourdough starter that didn’t create a lot of excess discard.
After much trial and error I’m at the place where I am pretty confident in my sourdough making. My loaves are not professional by any means, but they are exceptionally frugal to make, traditionally fermented and easy to digest, and taste delicious!
I’m starting this Sourdough Simplified series to share my methods and tips I’ve learned along the way. This is not the only way to do things by any means. But it’s one way, and I do find it to be much simpler than some of the methods I’ve come across. I’ve mentioned before that keeping the breadbox full is a woman’s birthright ;-) It shouldn’t be a task that takes a lot of time or effort. It should be—simple.
I’m going to begin by sharing how I maintain my sourdough starter.
What is sourdough starter?
Sourdough starter is the combination of flour, water, and the natural yeast from your environment. This ferments into a natural leaven that is used to make bread. Sourdough is the leaven of “the days of old" and was the common method of bread baking up until the early 1900s when commercial yeast was introduced. Commercial yeast was created to replace a natural leaven, giving quicker rise times, resulting in a faster bread making process. Unfortunately this form of yeast sacrificed quality, foregoing the 12-24 hour ferment time that breaks down the phytic acid in the grains, making them more digestible and the nutrients more bioavailable.
Using sourdough starter instead of baker’s yeast creates a bread that is fermented. During this process, the sourdough is essentially “predigested" for you, so that when you eat it, all your body has to focus on is absorbing the nutrients. Because of this, many who have trouble with gluten (myself included) are able to consume sourdough without a problem, whereas yeast breads that did not have time to ferment and break down the grains, remain bothersome.
In order to make traditionally fermented sourdough bread, one must begin with a sourdough starter. This is cultivated over the length of a week or two by combining flour and water and allowing the mixture to collect natural yeasts from the surrounding environment until it is strong enough to leaven bread. Once it is mature and active, with the right maintenance, sourdough starter can last indefinitely, and can be passed on from household to household and generation to generation.
having trouble cultivating a starter?
We know how hard it can be to get that starter of yours going. We want to equip you to make nutrient-dense homemade bread without the struggle!
Through the shop, you can purchase a piece of our sourdough starter that has been cultivated right here on the Calico and Twine Homestead. It is over 2 years old, mature and active. This starter has only ever been fed with unbleached, unbromated, certified organic flours and water purified by Berkey Filters. It comes with printed instructions and can be rehydrated in your own time.

“I have heard of some good old woman in a cottage, who had nothing but a piece of bread and a little water, and lifting up her hands, she said, as a blessing, What! all this, and Christ too?” —Charles Spurgeon
At Calico and Twine, we believe that having a breadbox and filling it with nutritious bread is a woman’s birthright. Sourdough does not have to be complicated, in fact it’s quite simple once you have a strong starter. Sharing sourdough starter was once a fun little tradition amongst the women folk, often called “friendship bread”.
We know how hard it can be to get that starter of yours going. We want to equip you to make nutrient-dense homemade bread without the struggle!
This sourdough starter has been cultivated right here on the Calico and Twine Homestead. It is over 6 years old, mature and active. This starter is only fed with unbleached, unbromated, certified organic flours and water purified by Boroux (Berkey) Filters. We have carefully dried the starter for ease of shipping and so you can choose to rehydrate it in your own time. The rehydration process is simple and you will be guided step by step with printed instructions.
Pair with our Sourdough Simplified Printed Recipe Book to create the ultimate bread-making starter pack!
*Ingredients: Organic rye, organic hard white wheat, organic hard red wheat, organic malted barley, purified water. CONTAINS WHEAT AND OTHER POSSIBLE ALLERGENS.
What you receive: 10 grams of dried sourdough starter chips, the perfect amount needed to rehydrate an active starter. You will also receive a beautifully printed instruction card taking you through the rehydration process step by step.
Packaging: Certified home-compostable kraft bag
For more starter tips and tricks visit: https://www.calicoandtwine.com/blog/maintaining-your-starter
*This is not a food product. Buyer accepts responsibility for reading ingredients and allergen warnings. Please do not purchase if you have allergies. This product may contain traces of allergens due to shared equipment. We are a cottage business and while we practice proper hygiene, we do not maintain an allergen-free kitchen.
“blessed shall be your basket and your kneading bowl.” deuteronomy 28:5

Maintaining a Sourdough Starter
There’s a few factors to consider in maintaining a sourdough starter. How you do this will depend on how often you use your starter, how much you need of it, as well as the climate in your home. As time goes on, you will find what works best for you and your schedule. For now, I will share what I do personally and you can glean inspiration as desired.
What to feed
While feeding with all-purpose flour can work, I have found that dark rye flour cultivates and maintains an extremely strong starter. Rye is nutrient dense, giving the starter lots to happily feed on and ferment. I have found that rye flour is also more forgiving than all-purpose. It doesn’t get sludgy or fall as quickly. For my first ever attempt at a sourdough starter, I used all-purpose. It didn’t get active or strong, it just ended up smelling like nail polish remover. However when I started over and switched to rye flour, I was able to cultivate the starter that I have now and have been using for over 2 years.
Now that my starter is mature and incredibly strong, I’m able to feed it with a majority of all-purpose flour, only using a scoop of rye occasionally if I notice it getting soupy or weak. The rye lends enough for the starter to remain active and strong, while the all-purpose keeps it light and fluffy and not too heavy or dense. I purchase certified organic from the brands Great River Milling or Azure Standard.
When choosing your flour, organic is ideal, but unbleached and unbromated is essential. A bleached flour will kill your sourdough starter. A sourdough starter is something that can be passed down for generations. It’s worth investing in by choosing high quality flour.
how much to feed
In my experience, a lower hydration starter means a stronger starter. I like to keep mine just slightly thicker than pancake batter. This makes it active and bubbly in no time and will also keep it at its peak for longer. Higher hydration sourdough starter tends to fall quicker and can easily get sludgy.
You do not need a scale to maintain a starter or make delicious sourdough bread! I never measure my feedings. You can simply feed your starter by eyeballing it. Add a little flour, a little water, and mix until your desired consistency. I know this may scare some people, but trust me— it’s very hard to mess this up. Learning to eyeball it creates less stress, less perfectionism, and less dishes!
Something that is really important to remember is making sure you are feeding enough so that there will always be some starter leftover after use. For a newer starter, you’ll always want about 1/4 cup at the very least leftover for a new feeding. A super mature starter can be depleted down to a 2 tablespoons or so. But you never want to use all of your starter because then you are left with nothing to feed and multiply, and you would have to start again the whole process of cultivating a new starter from scratch.
Let’s Talk Discard
The idea of always having discard turned me off from sourdough for awhile. It seemed like an overwhelming waste. I want my sourdough baking to be traditionally fermented, so there’s not a lot I like to do with excess discard other than the occasional discard crepe or discard cracker. I like to practice frugality in the kitchen, so I really don’t want to be using flour when I don’t really need it and if it’s just going to be dumped down the drain. But it is certainly possible to maintain a starter with little to no discard and I have been doing it this way ever since I began.
I keep my starter in a glass quart mason jar. When my starter is not in use, I keep it in the fridge to avoid daily feedings and excess discard going to waste. If sourdough is left on the counter, it needs to be fed daily, sometimes more if it’s really hot. Room temperature is the perfect environment for the yeasts to be active and therefore they always need something to be feeding off of. However when it is in the fridge, the yeasts slow down their activity and don’t need as much to feed off of. When I want to use my starter, I will take it out of the fridge, feed it, allow it to double in size on the counter, and then take what I need from the recipe. The rest of the starter that is left gets put back into the fridge until I want to use it again, repeating the same process. Because I’m using my starter 2-3 times a week, I haven’t found that I need to feed the starter again before putting it back in the fridge. However if you are only using your starter a few times a month, I would recommend giving it a small feeding before putting it back in the fridge.
This method creates essentially no discard. I never ever dump sourdough starter down the drain. In fact, when I want to make a discard recipe like crepes, I usually end up having to intentionally feed my starter to do so because I keep so little on hand. My starter is mature, so I keep the amount very low in the jar, maybe about 1/4 cup (but I have even gotten down to a few tablespoons and it was replenished again just fine!) and only feed it with as much flour as I need for whatever I plan to bake. This avoids excess waste.
Sourdough through the seasons
It will take some time to figure out when you should feed your starter before baking and when it’s at its peak. This will depend a lot on the seasons and the weather. In the warmer months, we prefer avoiding the air conditioning as much as possible and instead opening our windows for fresh air, even when it’s hot. This means my sourdough starter is doubling in size way faster than it does in the winter. In the summer months, I only need to take my starter out of the fridge and feed it a few hours before I want to bake with it.
In winter however, we practice frugality by keeping our furnace sent on 68F during the day at 65F at night. This means my starter is doubling in size way slower. In the winter I typically find myself taking the sourdough starter out of the fridge in the evening, feeding it, and then it is ready to use by morning (about 12 hours or so).
identifying your starter’s peak
I will start out by saying I am very lenient when it comes to using my sourdough starter on time. I have used starter way past its peak and my loaves have turned out fine. I have also used starter that could have risen a little longer and my loaves also turned out fine. There are some bakers that are very particular about using the starter on time, never sooner and never later, but like I’ve mentioned, my goal is simplicity here.
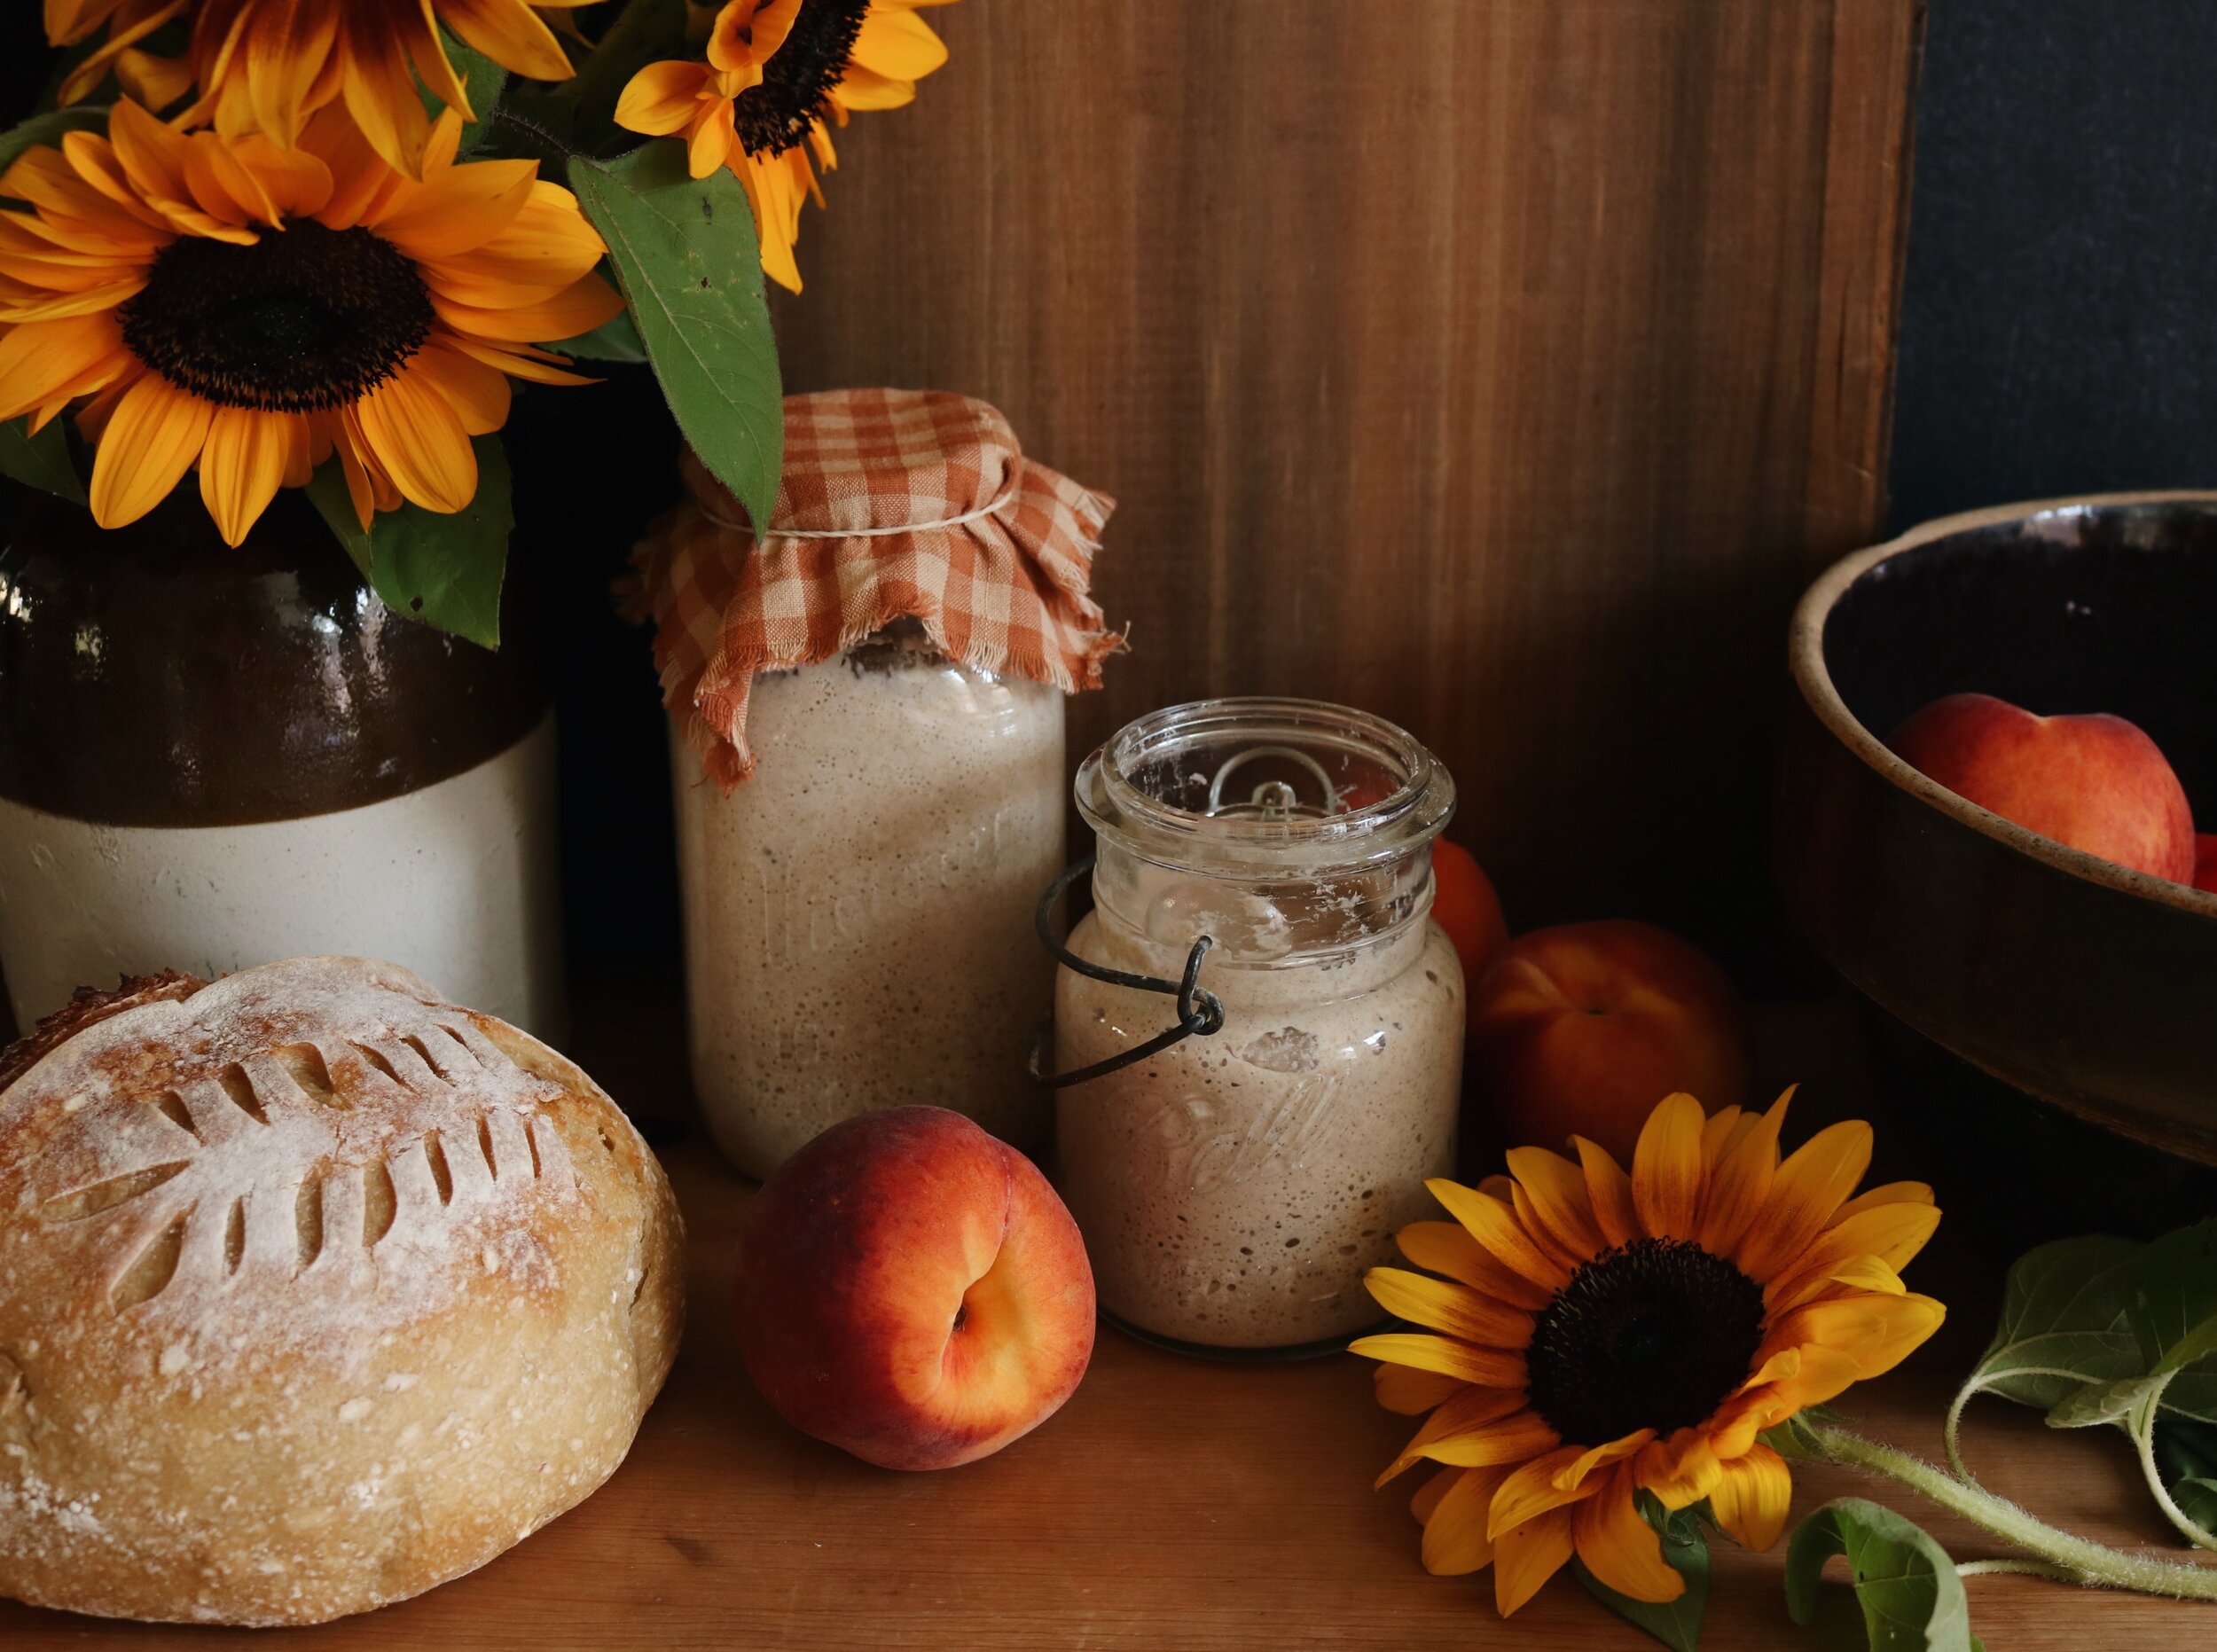
Ideally, you want to use your sourdough starter once it has doubled in size and before it begins to fall. You can use a rubber band to mark where your starter is when you first feed it, and when you notice it has doubled from that line, it’s most likely ready to bake. If the starter sits out too long, the yeasts will have nothing left to feed off of and the starter will begin to fall (you can kind of see an example of this in the photo below in the jar without a lid). Again, I have used starter at this point and my loaves have still turned out delicious, however they are more and more sour the longer the starter goes past its peak. Starter that is used on time will not lend a sour flavor in the dough at all. In fact, my loaves are hardly ever noticeably sour, but rather have a rich depth of flavor.
Another way to test if your sourdough starter is strong enough to bake with is by performing a float test. Fill a bowl or cup with water and drop a spoonful of sourdough starter in. If it floats, it’s ready to bake with! Don’t feel like you have to do this every time you bake however. This test is good to do when you have just activated our Calico and Twine Sourdough Starter or if you have just cultivated your own and are wondering if it’s ready to use. Once you get the hang of it, you’ll be able to determine when your starter is ready to make a loaf just by looking at it.

While I am certainly not an expert by any means, I have learned throughout the years that sourdough is incredibly forgiving. I’m always experimenting, trying new methods of feeding, recipes, and more. While you can certainly rigidly follow scale measurements and recipes for maintaining your starter, it’s freeing to take the time to learn how to eyeball things. It will take some practice to learn your way around your starter but it will feel like second nature in no time. Like I mentioned at the beginning of this post, I want my sourdough to be simple and it is possible! It is truly not as confusing or time-intensive as it may seem at first.
I will be continuing Sourdough Simplified in future posts, sharing more about why I choose sourdough over commercial yeast breads, different methods of proofing, baker’s schedules, and my go-to basic recipes, and more.
What other questions about maintaining sourdough starters do you have? If there’s anything I missed I’ll try my best to answer your questions in the comments.
Until next time, happy baking!
“Blessed shall be your basket and
your kneading bowl.”
more sourdough simplified…